After you save the project, the Plan Organizer opens so you can add an initial Plan Set.
This is a fairly long article, we apologize for that, but there just is not a good way to break it into multiple articles without losing one's train of thought, please bear with us.
In the next chapter, we cover
plan organization in
detail, for now, we just want to walk you through the process of adding a
Plan Set to the
project we created in the previous article.
The video below gives a great overview of the Plan Organizer and the Plan Set Editor, some of it is more than you need to know right now, but if you have 4 minutes and 2 seconds, the video helps you understand the concepts of plan organization.
Adding Initial Plan Set
Continuing where the the previous article left off, when you create a project, as soon as you click Save (which creates the project), the Plan Organizer (below) launches, automatically.
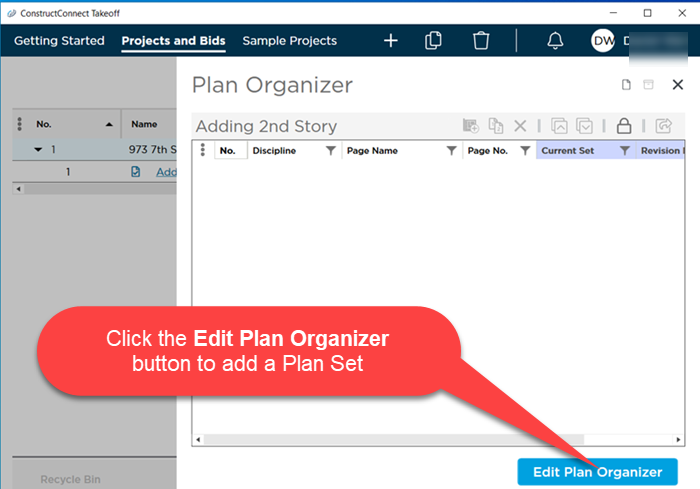
Click the Edit Plan Organizer button in the lower-right corner, to unlock the Plan Organizer so you can add a Plan Set.
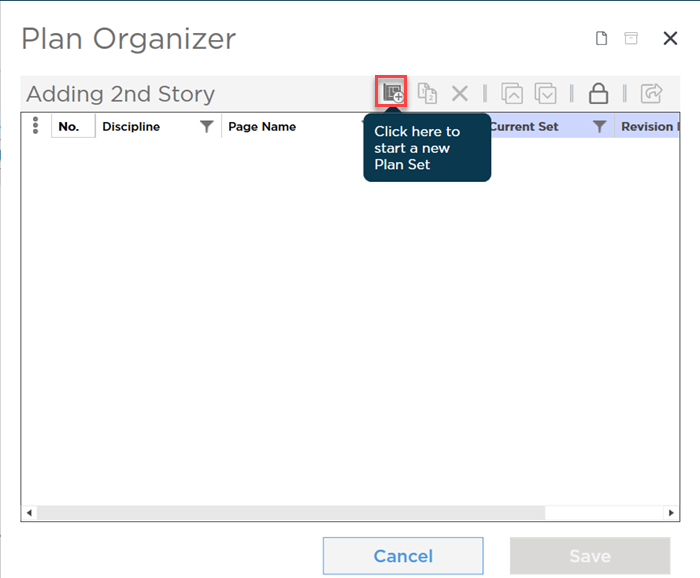
In the (unlocked) Plan Organizer, click the New Plan Set button  , the Plan Set Editor dialog box opens,
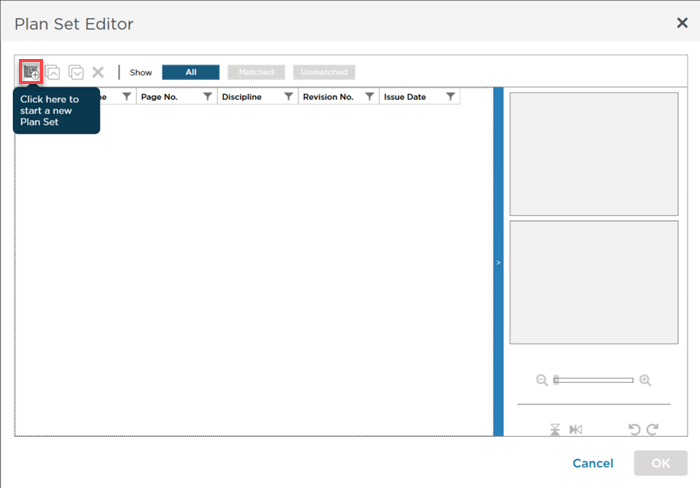
In the Plan Set Editor, click the New Plan Set button , the Browse for Folder dialog box opens,
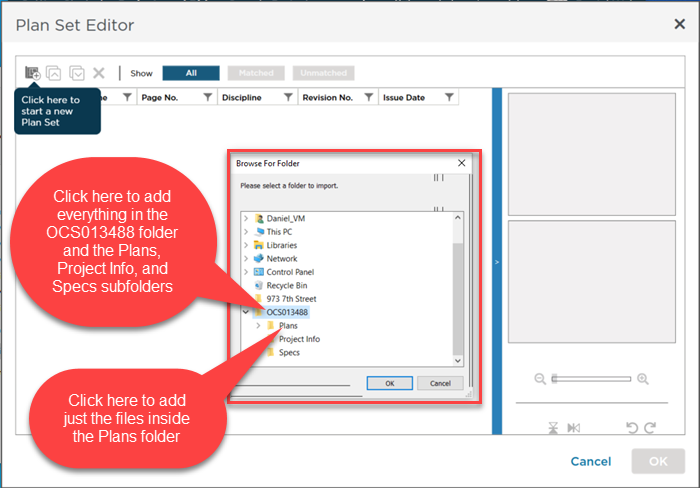
Using this dialog box, locate where the image files that are to be added to this Plan Set are stored. All supported files in the selected folder and all subfolders are added to this Plan Set so be sure to select (click on) the lowest folder containing the plans you want to import. More information about "supported file types" is available in Related Articles.
Click OK in the Browse for Folder dialog box and all supported Plans are added to the grid.
The first time you use the Plan Set Editor, you are presented with a Windows Firewall (or your company's chosen firewall) warning.
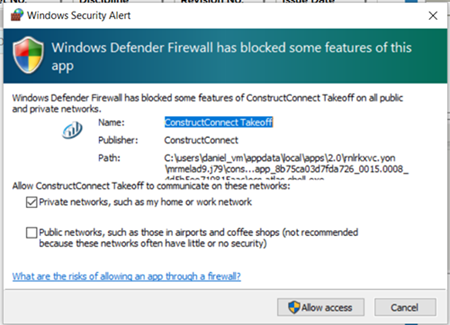
You must click "Allow Access" to process plans.
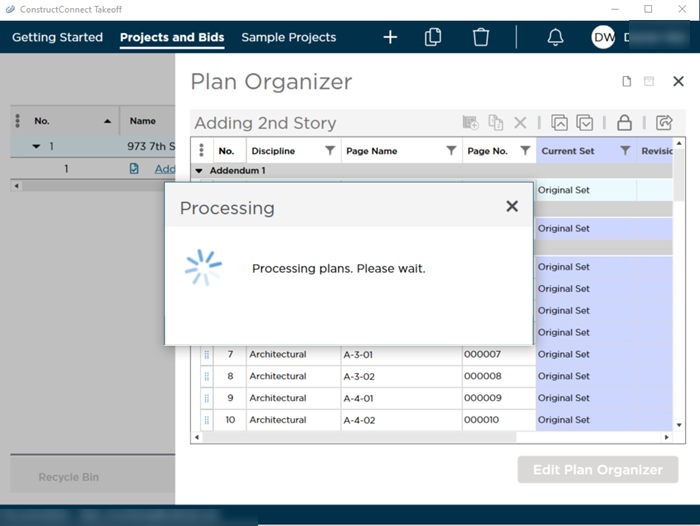
The image files are processed, which means they are converted to a TIFF for use in the Takeoff platform, and their orientation and rotation are set, based on what can be detected.
The progress indicator displays overall progress and the page indicator changes color as plans are processed.
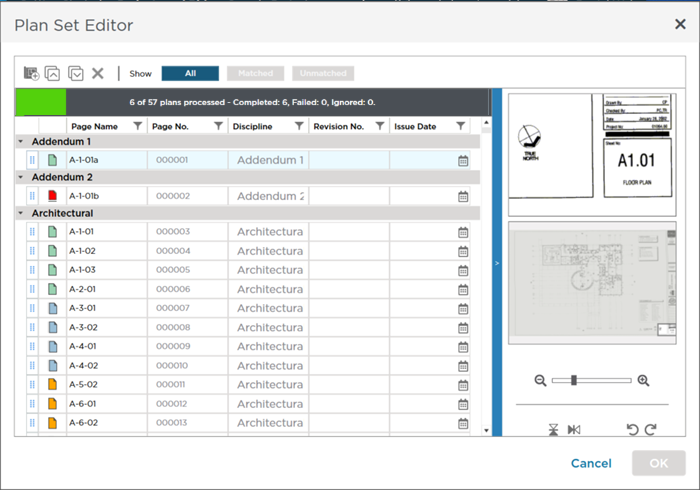
 Green - Processed Successfully, the file associated with this page was converted to a TIFF and is ready to be uploaded to the Cloud.
 Blue - Processing, the file is being converted to TIFF.
 Red - Processing Failed, you must remove this file from the Plan Set before you can save it - you can then review the original files to determine why this particular file could not be converted to TIFF.
 Orange - Pending Processing, ConstructConnect Takeoff has not begun converting this file yet.
While the program is processing your plans (converting the original files to TIFF in preparation for upload to the Takeoff servers) the Plan Set Editor is locked - you cannot do anything else with ConstructConnect Takeoff while it is processing plans. Processing can take just a few seconds (for this example project) to several minutes (for a project containing hundreds of images).
When all the plans are processed, the OK button becomes active. Click OK to save the Plan Set - the Plan Set Name dialog box displays.
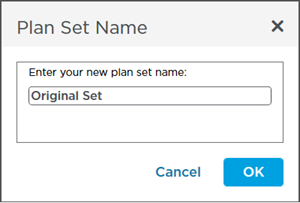
Enter a logical, expressive name for the Plan Set. Be descriptive but do not get carried away - there is limited space to display Plan Set Names in the Plan Organizer - keep your Plan Set Name to under 20 characters or so. Another reason to keep Plan Set Names relatively short is because the Plan Set Name is displayed in at the bottom of the Takeoff window (this allows you to switch between Sets quickly). You want to be able to identify the Set, but you want to see as many Plan Set tabs as possible.
Click OK and you are returned to the Plan Organizer. At this time, these plans have not be uploaded to the Takeoff Cloud, if you cancel out, you will have to start the process over from the beginning.
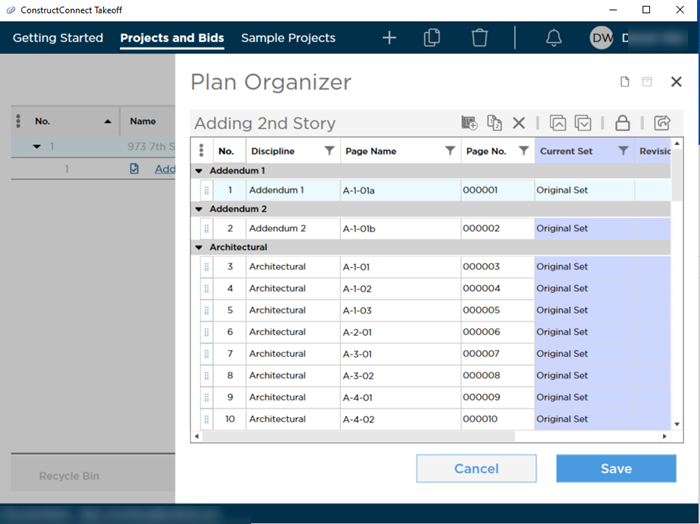
You can change the Sheet Names, Sheet Numbers, Discipline, Revision Number, and Issue Date or leave them as they are extracted from your plan files. Plans are organized into Disciplines (groups) that are created automatically based on the folder in which the plan is located (many General Contractors or self-performing contractors may work on more than one discipline such as Architectural, Site, Mechanicals, etc.). For the sake of getting this Plan Set added quickly, we leave all the details at their defaults but this is definitely not "best practice" which we cover in the next Chapter.
Click the Save button on the Plan Organizer and the program begins processing your Plan (Again?? yes, this time, it is preparing the Plans for upload to our servers).
The first time you upload plans to the cloud server, you are presented with a second Windows Firewall (or your company's chosen firewall) warning (yes, this is a 2nd firewall Warning - Windows is very concerned with your computer's safety).
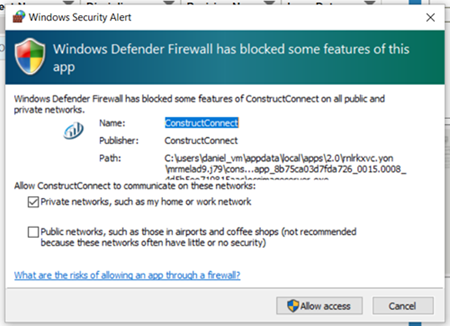
You must click "Allow Access" to upload plans.
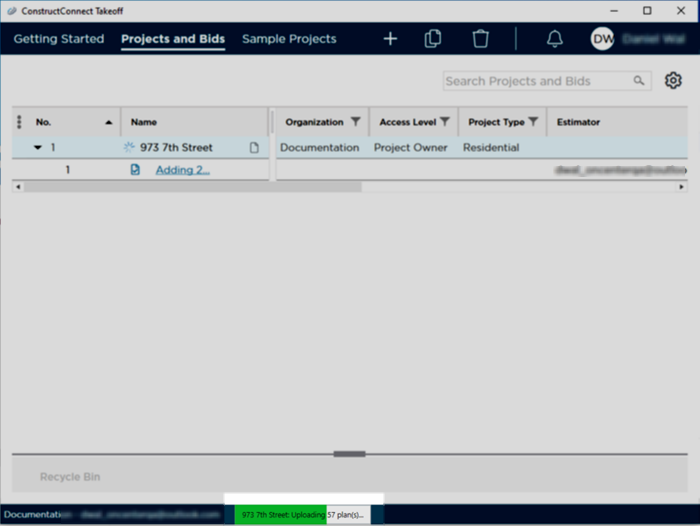
Once initialization is complete, the uploading is done in the background - you see the progress on the Projects and Bids List.
Uploading your plans can take several minutes, depending on how many Pages are being uploaded, your internet connection speed, the size of the Pages, and if you have enabled color drawings (see Related Articles for instructions on enabling color).
When you close the Cover Sheet, you are returned to the main screen (Projects and Bids lists) where you can monitor the upload progress.
When you click "Save", the
Cover Sheet does not close automatically. To close the
Cover Sheet, click the "X" in the upper-right corner to close the
Cover Sheet. This is by design so that if you need to adjust
Project Access, you can do it before you close the
Project Cover Sheet.
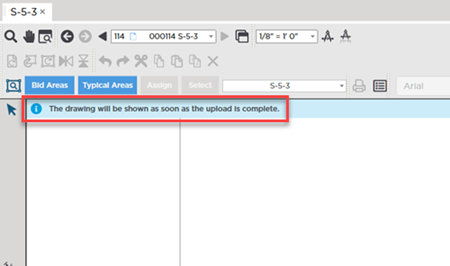
To open the bid you just created, double-click on the Bid Name. While the plans are uploading, you can open this bid, although if a plan is not available in the cloud, you see a notification, such as the one below. Wait a bit for the plan to upload and try this Page again.
If you do not add or enable a Plan Set in a Bid, you can still open it, however, what you can do is very limited - you cannot create any Takeoff Items or draw any takeoff or Annotations without a Plan on which to do that work.

 Creating a Project Manually - Step 1 - Create the Project and Base Bid