The Plan Set Editor is where you add, modify, and delete Plans from a Plan Set and where you match Revisions of existing Pages. Remember, a Plan Set is a collection of construction Plans (aka. drawings, sheets, images, blueprints - whatever you call them). When a job starts, normally you are provided with the initial, what we call the "Original", set of Plans. Subsequent sets of drawings are called Revisions and may include Plan Sets such as "50% Complete", "Addendum 1", or "May 20, 2015 Changes to X" depending on how you receive/manage your plans.
If you are using a Project you pulled own from Project Intelligence, your Plan Sets are added to your project and revision-matched automatically. There are some fields you may want to update such as Page Names, Page Numbers, Revision Names, Numbers, and Dates, and Disciplines to make working with the Pages in your Bid more efficient.
Most of the information below pertains to Projects you create in ConstructConnect Takeoff.
As you add Plan Sets, the most current issue or version (revision) of each Plan (drawing) becomes part of the "Current Set" for that Page. The Current Set always shows you the most recent, active revision for every Page in your project.
We cover loading and matching Revisions in Chapter 11 because we want you to become with the tools for plan organization before trying to explain advanced concepts. This article details the Plan Set Editor and how it works.
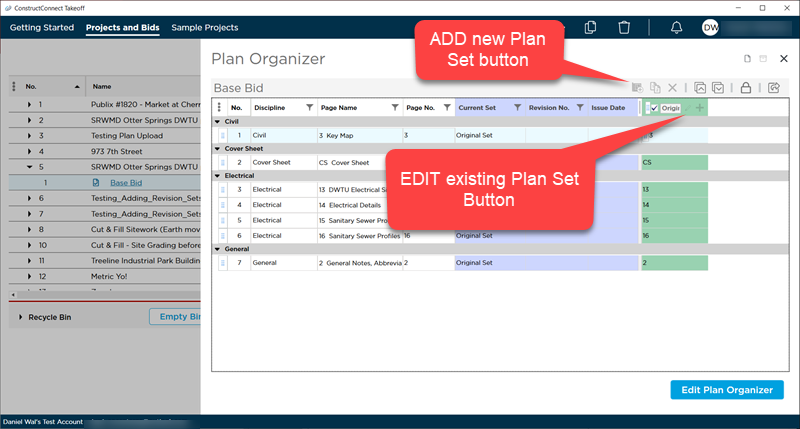
There are two reason to use the Plan Set Editor:
- You need to add a Plan Set to a project.
- You need to edit the Plans in a Plan Set (adding additional Plans to a Plan Set or matching revisions that you did not match up when you originally added an addenda Plan Set).
Either way, the functionality of the Plan Set Editor is the same, you just open it differently. You have already seen how the Plan Set Editor opens when you create a project (adding a Plan Set).
To start, you have to open the Plan Organizer. You can do this from the Takeoff Tab or from the Projects and Bids List. (See Related Articles if you are unsure how to open the Plan Organizer).
Once you have the Plan Organizer open...
- To add a new Plan Set to a Project, click the
 and then click the Add New Plan Set button
  in the Plan Organizer.
 - To update an existing Plan Set, click the and then the Edit Plan Set button
 in the column header for whichever Plan Set you need to update.
The Plan Set Editor
The Plan Set Editor is where you upload project Plans, updating their details (such as Page Name, Page Number, Discipline, Issue Date), and match them to previous versions/releases.
The Plan Set Editor is designed to make it easy to preview Plans so you can make sure they are orientated correctly, named logically, and grouped into appropriate Disciplines.

| What it is | What it does/How it is used |
|---|
| Toolbar | The toolbar, covered in the next article, provides access to the tools you use to add Plans to and delete Plans from a Plan Set, expand/collapse Discipline groups, and filter the Plan Set Grid to make revision-matching easier. |
| Column Headers | Each column header includes a filter. This makes it easy if you want to adjust some fields on Plans matching a particular filter criteria (Name, No., Discipline, etc.). |
| Plans Grid | Each Plan in a Plan Set shows on a single row. For example, if you uploaded a PDF that contained 100 drawings (plans), each drawing would show up on a separate row and each becomes a separate Page in the Plan Organizer. |
| Zoomed in Preview | Displays a preview of the Plan (by default zoomed-in on the lower-right corner, as that is where title blocks are found most often). You can update each Page's Page Name and Page Number to match the Plans. |
| Full Page Preview and Pan Control | Shows you an overview of the Plan with an indicator highlighting what is being shown currently in the Plan Preview box. Helpful if the title block isn't located in the default/expected location and you need to locate it. |
| Zoom Control | You can adjust the zoom of the Zoomed in Preview so you can see the title block. |
| Rotate Control | When you first add a Plan to a Plan Set, you can rotate it in 90 degree increments. Once you save the Plan Set and create a Page for this Plan, it's orientation (portrait/landscape) is set and cannot be changed. You can only rotate a Page in 180 degree increments or flip it (horizontally or vertically) to maintain the saved orientation. |
The next few articles explain in detail how to use the Plan Set Editor and then we move into adding and managing Plan Sets.

 A Detailed Look at The Plan Organizer Grid