In addition to the Keyboard Shortcuts covered in the previous article, there are Context Menus throughout the program that provide quick access to many functions (indeed, some functions, such as aligning area takeoff grids to a plan or converting a piece of linear takeoff to a curved segment or from curved to straight, are available via the Context Menu only).
You access Context Menus by right-clicking (or left-clicking if you are using left-handed mouse settings) - throughout this user guide, we refer to alternate-clicking as "right-click" usually, our apologies, Southpaws.
Where You Right-click is Important
You can right-click on a piece of takeoff and see one Context Menu and click just a few pixels away on the plan and see a different Context Menu.
Right-clicking on a piece of linear takeoff presents a slightly different menu than right-clicking on a piece of area takeoff, or a count takeoff object.
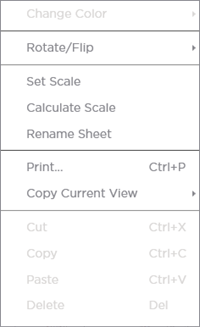
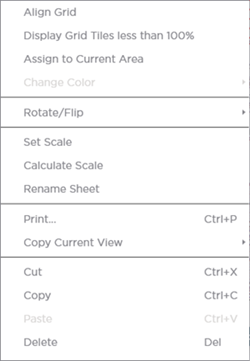
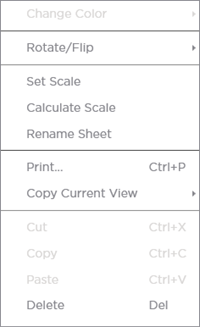
On the Plan (but not on anything you've drawn)
If you right-click on the plan, not on a piece of takeoff or an annotation,
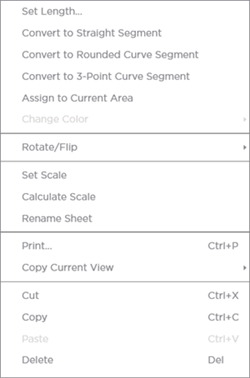
On a Takeoff Object (or Objects)
Right-clicking on a piece of takeoff shows you a Context Menu with options for editing that type of takeoff (linear, area, count, attachment),
When you right-click on a piece of (Linear) takeoff.
| Linear Takeoff | Area Takeoff | Attachment |
|---|
 |  |  |
| Gridded Area Takeoff | Attachment |
|---|
|  |  |
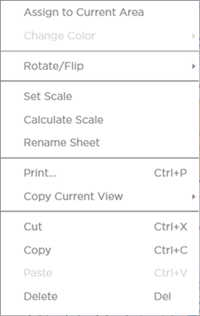
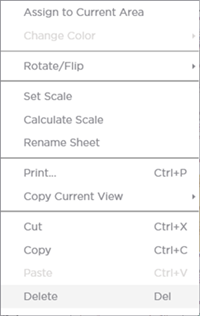
Notice that the options changed to reflect the activities that can be performed on a specific piece of takeoff.
On an Annotation
If you right-click on an annotation, sometimes you are given the option to open it (Punch Items or file attachments) or change its appearance (color or line width),
Context Menu Options Explained
In the grid below, we explain all possible Context Menu choices. When an Option shows a ">", that means there is a sub-menu from which you make addition choices,
| Option | What it does/How it is used... |
|---|
|
| Common to All Takeoff |
| Assign to Current Area | Allocates the selected takeoff object(s) to the Active Area (the Bid or Typical Areas showing in the Status Bar) |
|
| Linear Takeoff |
| Set Length... | Allows you to manually enter a segment length for a Linear takeoff object. |
| |
| Linear and Area Segments |
| Convert to Straight Segment | For Linear and Area takeoff objects, allows you to change a segment back to a single, straight segment when it was drawn as a curve. |
| Convert to Rounded Curve Segment | For Linear and Area takeoff objects, allows you to change a segment back to a single, straight segment when it was drawn as a curve. |
| Convert to 3-Point Curve Segment | For Linear and Area takeoff objects, allows you to change a segment back to a single, straight segment when it was drawn as a curve. |
|
| Area Takeoff |
| Set Slope Direction | Area Conditions can be set up to account for slope. You can use this option to change the direction that a piece of takeoff slopes - affects perimeter length calculations. |
| Align Grid | Area Conditions can be set up to account for grids, such as ceiling or floor tiles. You can align this gridded takeoff to match your plans - this affects visible tile counts and grid length calculations, along with partial tile counts. |
| Display Grid Tiles less than 100% | After you have drawn all your gridden takeoff, you may want to identify how many partial tiles are left around the perimeter. Calculating partial tiles takes a little time and processing power - we recommend not activating this until you are done drawing takeoff and then turning it off when you have your partial tile values. |
| |
| Annotations (not all show all options) |
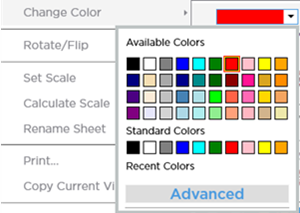
| Change Color > | When you click "Change Color", the current selected color shows, click the drop-down to view the list of available and standard colors.
Click Advanced to select a custom color.
 |
| Open | Opens a Punch List Item or a File Attachment |
| |
Common
|
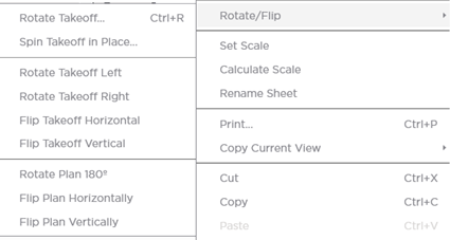
| Rotate/Flip> | You can rotate or spin takeoff (leaving the plan as is) and annotations, rotate or flip just the plan, or rotate the plan and takeoff (and annotations) at the same time. If you are rotating the plan by itself, you are limited to 180° to ensure takeoff does not fall outside the page boundaries. We discuss rotating takeoff and plans (and both) in Chapter 09 (see Related Articles).
 |
| Set Scale | Opens the Set Scale dialog in which you can select from a predefined list of common scales or enter a custom scale for the current Page.
|
| Calculate Scale | Launches the Calculate Scale utility that allows you to set the scale of the current Page based on a known-length visible on the plan. |
| Rename Page | Opens a utility that allows you to rename the Page . You can navigate to the next or previous Page by using the arrows on either side of the "Select" box, or you can use the Page Navigator drop down to quickly select a different Page. Changes are saved immediately when you select a different Page or click Save.
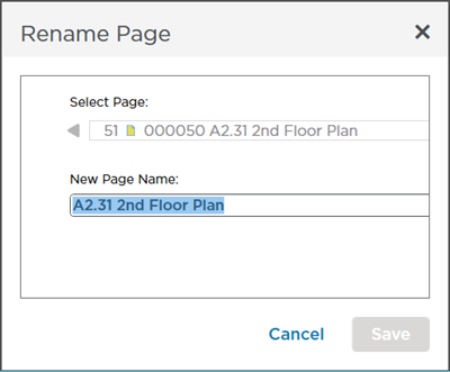
The Page displayed in the Takeoff window updates to match the Page selected in the dialog box so you can see the Title Block on the plan. |
| Print | Opens the Printing dialog box so you can print the project Page, takeoff, and annotations (including the Image Legend). Remember, you can always press Ctrl + P on your keyboard to launch the Print Preview screen. |
| Copy Current View | Opens a submenu with three options.
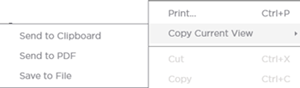
- Send to Clipboard - Copies whatever is being shown in the active Takeoff Window to the Windows Clipboard - from there, you can paste it into any Windows application that can access the Clipboard.
- Send to PDF - Saves whatever is being shown in the active Takeoff Window to a PDF file.
- Save to File - Saves whatever is being shown in the active Takeoff Window to an image file (jpg, jpeg, or png).
|
| Cut, Copy, Paste, Delete | Standard Windows shortcuts for copying and pasting selected objects. ConstructConnect Takeoff includes some very powerful tools for manipulating takeoff, discussed in Related Articles. |

 Takeoff Window Keyboard Shortcuts