After you create Bid Areas (previous article), you can reorder them (move them within the same level), promote or demote them (change their level), or delete them.
Reordering Bid Areas
There are two ways to adjust where a Bid Area lies in the grid.
Move Up and Move Down Buttons
You can move a single Bid Area by clicking on it, then clicking the Move Up  or Move Down
  button on the toolbar.
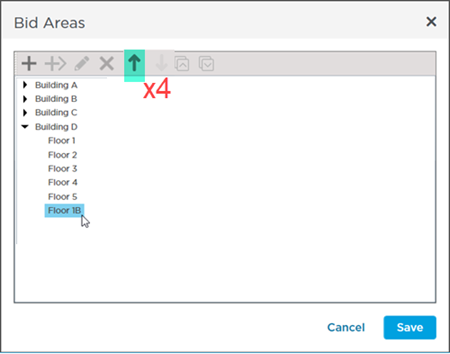
In our example below, we added "Floor 1B" after we had added Floor 5, so we need to move Floor 1B up, between Floors 1 and 2.
We click "Floor 1B" and then click the Move Up button  four times.
There is an easier way, of course...
Drag-n-Drop
If you create a Bid Area or Child Area in the wrong order, under the wrong Bid Area, or create a sub-area when you meant to create an area at a higher level, instead of using the Move Up/Down buttons (above), you can just drag-n-drop it where it should be.
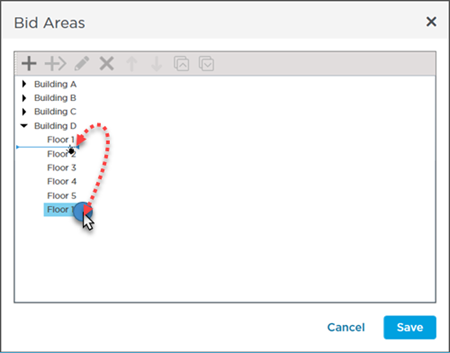
In our screenshot below, we want to move Floor 1B between Floor 1 and Floor 2.
Simply click on the icon next to the Bid Area name and drag it onto the appropriate location.
You can "promote" or "demote" Bid Areas using drag-n-drop also. Just drag the Bid Area onto the correct Parent or completely to the top of the list.
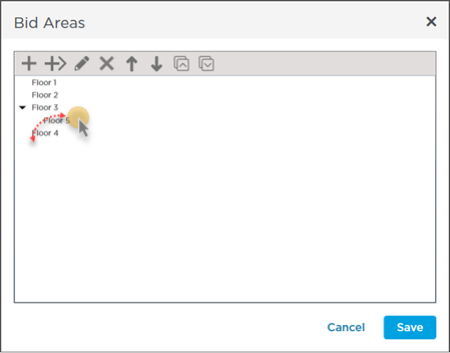
Click on the Bid Area and drag it to the parent to to the point where the dialog box turns blue:
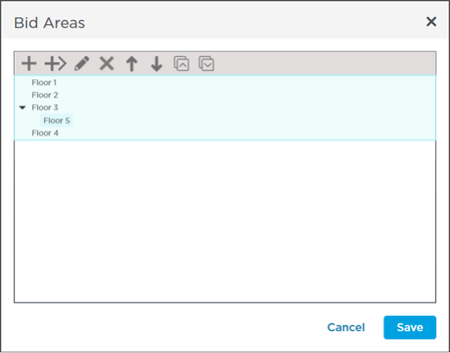
Make sure the Parent is highlighted with the blue box before dropping the sub-area (see below...)
Promoting and Demoting Bid Areas
When you drag and drop Bid Areas around the grid, you can promote (move a Child Area to a higher level) or demote (make a Bid Area a Child Area) Bid Areas.
Promoting an Area
Moves a Child Area up in the hierarchy. Grab the Child Area and drag it toward the outer edge of the grid to make it a top-level Bid Area or on top of a higher-level Bid Area to make it a Child of that Bid Area.
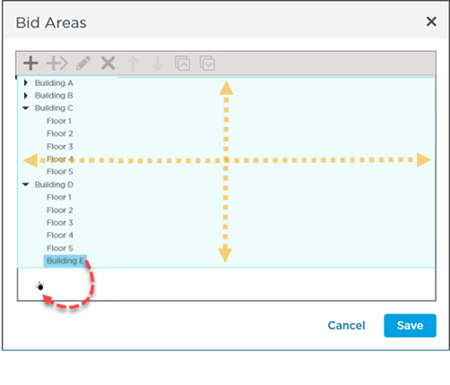
Demoting an Area
Moves a Child Area down in the hierarchy. Grab the Child Area and drag it on top of a Bid Area, until that Bid Area is surrounded by a blue square, then release.
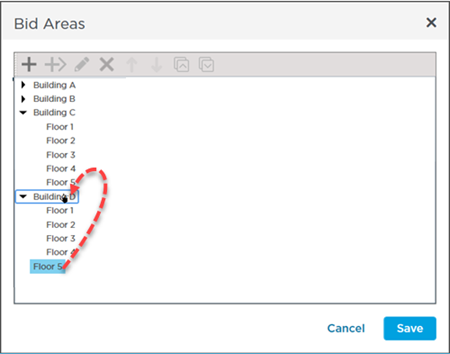
Make sure the Parent is highlighted with the blue box before dropping.
Your changes are not saved until you hit Save.
Deleting Bid Areas
You can delete any Bid Areas you do not need by highlighting it and clicking the Delete button on the toolbar.
There is no warning prompt when you delete a
Bid Area from within the
Bid Areas dialog box, but your changes do not take effect until you hit the
Save button, in case you change your mind.
What Happens When You Delete a Bid Area?
- All takeoff assigned to a deleted Bid Area is reassigned to the Page Area on which the takeoff resides.
- Deleted Bid Areas are removed from the Typical Areas grid along with any allocated amounts (this can have a significant effect on your cumulative takeoff totals).
- All Child Areas are deleted.
Deleting a
Bid Area cannot be "undone" - think before you click
SaveReview the articles that follow for information on assigning takeoff to Bid Areas and using Bid Areas to control what you see in the Takeoff Window.

 or Move Down
  button on the toolbar.


 Adding (or Creating) Bid Areas