When you include one or more Area Takeoff Items in your selection for Multi-Condition Takeoff, you draw the takeoff using the Area Takeoff Tools. For a refresher on drawing Area Takeoff, see Using Area Takeoff Tools.
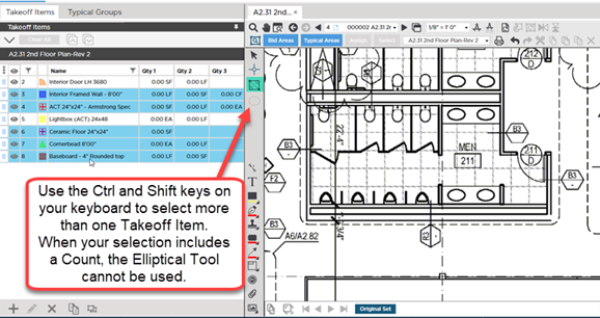
In the example below, we selected five Takeoff Items including two Areas, two Linears, and one Count. This represents a room full of takeoff that would take over 30 clicks to complete, and a lot of repetitive action.

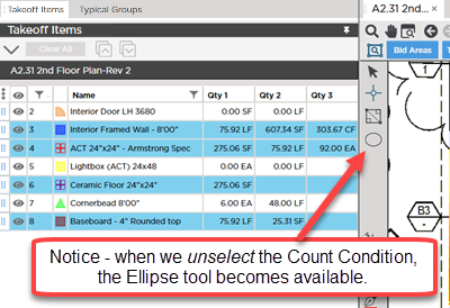
Anytime you include a
Count Takeoff Item in our selection, the Elliptical Tool is disabled because there are no corners in an ellipse in which the program could place a Count object. See the previous article for more information on some rules and restrictions related to
Multi-Condition Takeoff.
That leaves you with Polygon  and Rectangle
  Area Takeoff Tools - choose the Takeoff Tool that suits your needs.
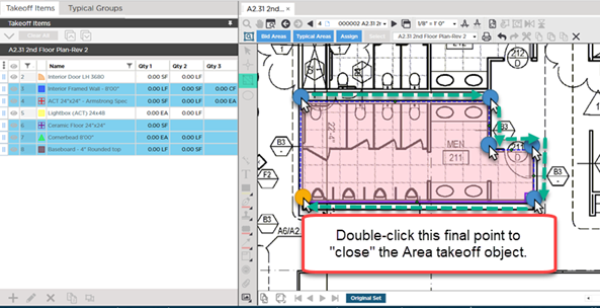
Now, draw the Area, double-clicking to close it.

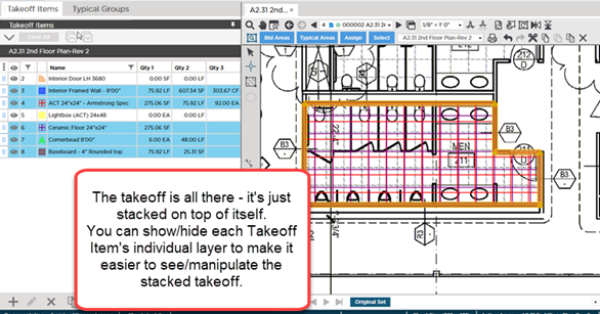
Each Takeoff Items' takeoff is completed automatically.
The green arrow and blue dots indicate how we drew the takeoff - the yellow dot indicates a double-click.

An entire room of takeoff drawn in just a few clicks. You can tell by the Takeoff Items' Results that the takeoff is drawn.
When you use Multi-Condition Takeoff, objects are placed exactly on top of each other - this can make them a little tough to see. You can show-hide the different Takeoff Items' takeoff to make it easier to see the individual objects (toggle the "Show" indicator to the left of each individual Takeoff Item in the Takeoff Items Pane). See Related Articles if you need a refresher on using Custom Layers and Takeoff Item Layers.
If you are not including any Count Takeoff Items, you can also use the Elliptical Tool, and draw the takeoff for a room in one or two clicks - how do you like that for efficiency.

If you are not using Area Takeoff Items, you use the Linear or Count Takeoff Tools.


 and Rectangle
  Area Takeoff Tools - choose the Takeoff Tool that suits your needs.


 What is Multi-Condition Takeoff?