You may recall that Takeoff Items must be unique by "Height" - for example (see Related Articles for information on Takeoff Items), to take off walls that are 8' and 10' high, you need two separate Takeoff Items. Many times, height is the only thing that changes from one page to another when taking off something such as a mid- or hi-rise building. Instead of drawing all the takeoff on an 8' plan and then re-drawing it on a 10' plan, you can copy all the takeoff from the 8' Page, paste it on the 10' Page, and then use the "Reassign Takeoff" function, described below, to change that pasted takeoff to be associated with the appropriate 10' Takeoff Item(s).
Or maybe, by accident, you draw an entire Page worth of takeoff with an 8' Takeoff Item then realize you were taking off a 10' plan. No need to delete and redraw, just select all that takeoff and reassign to the 10' Takeoff Item.
You can reassign takeoff to a Takeoff Item that already exists (explained below) or use Duplicate and Reassign (next article) to create a new Takeoff Item (or even Takeoff Items) and assign all the selected takeoff to it (or them) all at once.
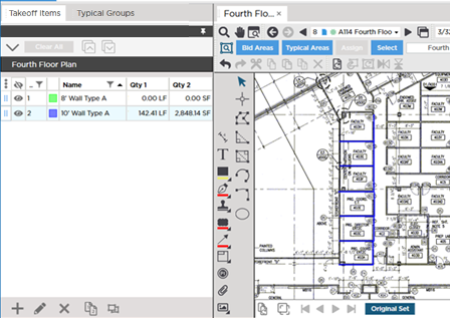
For this example, we took off the second floor of a building with 8' high walls. The fourth floor of this building has the exact same layout, but the ceiling is 10' high.
We already created two Takeoff Items: 8' Wall Type A and 10' Wall Type A.
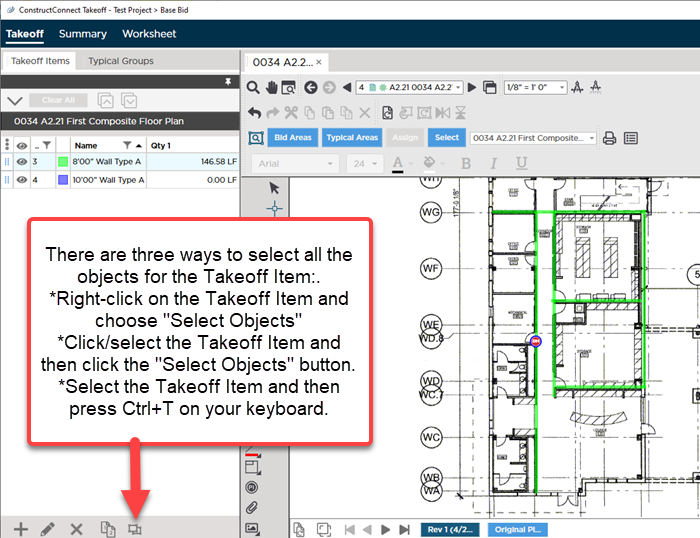
We only take off a few walls so you can see how this works, but in reality, you probably would select all takeoff on the Page for the 8' Takeoff Item (select the Takeoff Item and press Ctrl+T). See Related Articles for more information on selecting the object(s) you want to assign to a different Takeoff Item.
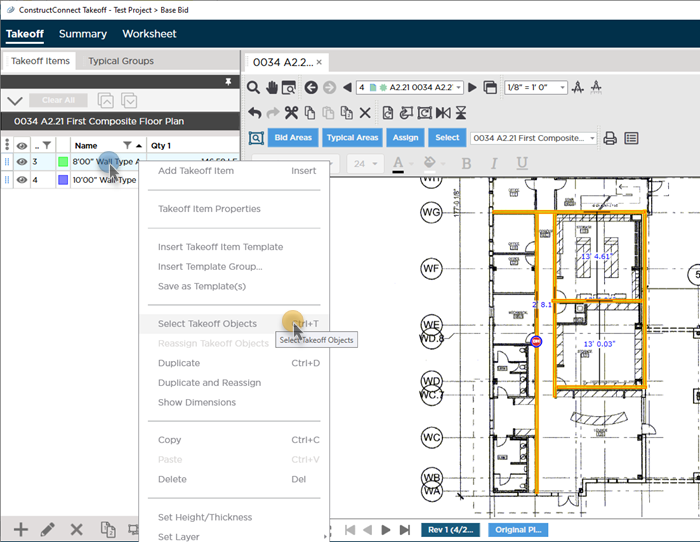
Click the  button on the Edit toolbar (or right-click and select Copy or press Ctrl + C on your keyboard) to copy the takeoff objects into memory.
Switch to the Page that represents the 10' floor plan.
Click the  button on the Edit toolbar (or right-click and select Paste or press Ctrl + V on your keyboard) to paste the takeoff objects from memory.
Align the takeoff objects to the Plan, but do not click anywhere else just yet.
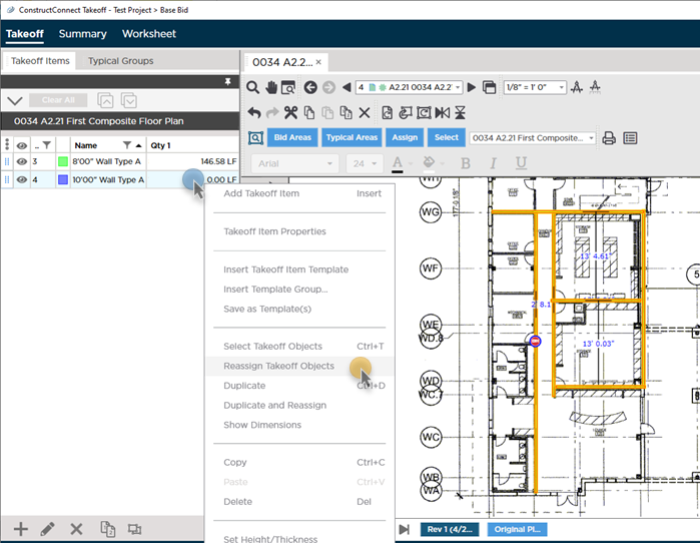
While the takeoff objects are still selected, right click on the Takeoff Item to which you want to re-assign the objects (in our example, the "10' Wall Type A" Takeoff Item).
Select "Reassign Objects" from the Context Menu.
After reassignment, the objects take on the new Takeoff Item's properties (colors, width, shape, etc.) and the Results update to reflect differences between the two Takeoff Items (notice the different in Result 2 - the square footage of the wall).
If you have not created the Takeoff Item to which you want to reassign we have you covered already, review the next article.

 Flipping Takeoff Objects Vertically and Horizontally