In the previous article, Reassigning Takeoff from One Takeoff Item to Another Existing Takeoff Item, we covered selecting a single Takeoff Item's takeoff and reassigning it to an existing Takeoff Item. What happens if you have not created the Takeoff Item to which you want to reassign the takeoff? You use "Duplicate and Reassign Takeoff" Of course!
Duplicate and Reassign a Single Takeoff Item
For this example, we took off the second floor of a building with 8' high walls. The fourth floor of this building has the exact same layout, but the ceiling is 10' high.
This is a 4-step process:
- Copy Existing Takeoff
- Paste Existing Takeoff to new Page
- Duplicate Takeoff Item and Reassign Takeoff (the program does this for you with one click)
- Adjust new Takeoff Item's Height
Step 1 - Copy Existing Takeoff
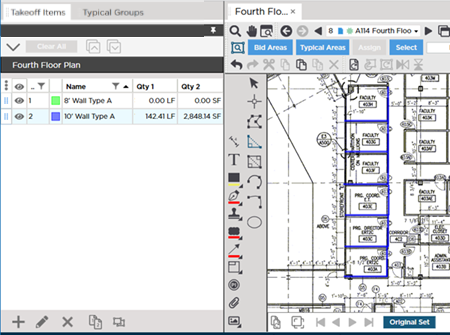
As you can see, we created the first Takeoff Item (8' Wall Type A) but have not created the 10' Wall Type A Takeoff Item. (If the 2nd Takeoff Item already existed, we would use the process in the previous article.)
Now, on the page where the takeoff exists (the 8' floor plan),
- Select all takeoff on the Page for the 8' Takeoff Item (select the Takeoff Item and press Ctrl+T or click the
 button). See Related Articles for more information on selecting the object(s) you want to assign to a new Takeoff Item.
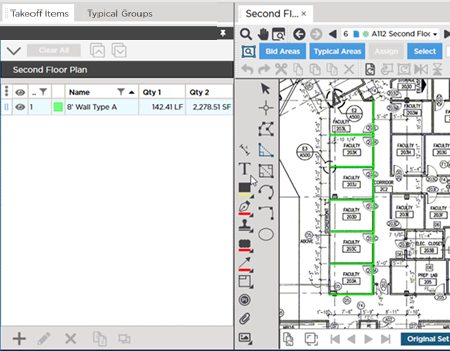
We only took off a few walls so you can see how this works, but in reality, you would likely be looking at an entire Page of takeoff objects to reassign.
Notice, the takeoff is selected, it's highlighted in yellow.
- Click the
 button on the Edit toolbar (or right-click and select Copy or press Ctrl+C on your keyboard) to copy the takeoff objects into memory.
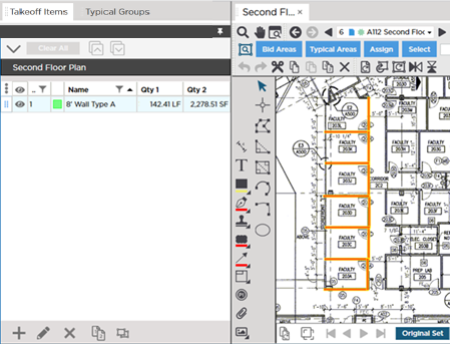
Step 2 - Paste Takeoff
- Switch to an Page that represents the 10' floor plan.
- Click the
 button on the Edit toolbar (or press Ctrl+V on your keyboard or right-click and select Paste) to paste the takeoff objects from memory
It's
best if you use the keyboard short or the toolbar button - that way, the
takeoff is pasted in the same relative position as the existed on the original
Page - you'll have to move it less.
- Align the takeoff objects to the Plan.
Step 3 - Reassign Takeoff
Next, we're going to make a copy of that original Takeoff Item and Reassign all the objects (on this Page) to the copy.
- Right-click on the Takeoff Item (in the Takeoff Items Pane)
- Choose "Duplicate and Reassign Objects" from the Context Menu.
You do not need to have any
takeoff objects selected/highlighted at this point - you're not duplicating the
takeoff objects, you're duplicating the
Takeoff Item and then reassigning those objects to the new
Takeoff Item.
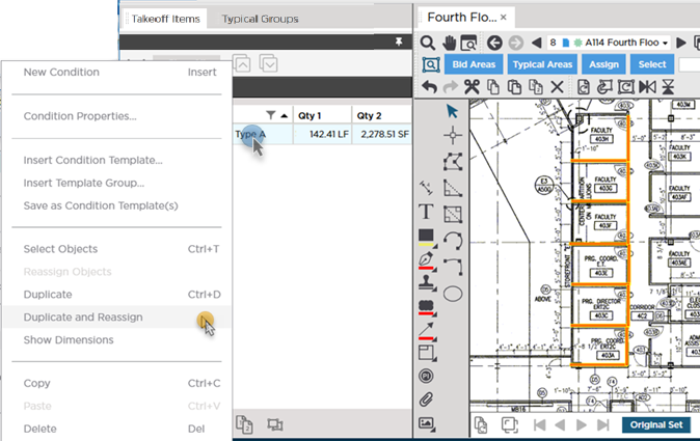
The program:
- Creates an exact copy of the original Takeoff Item (except for Number and Color) and then
- Automatically re-assigns all the takeoff objects on the current Page for that original Takeoff Item (Takeoff Item No. 1) to the new Takeoff Item (Takeoff Item No. 2)
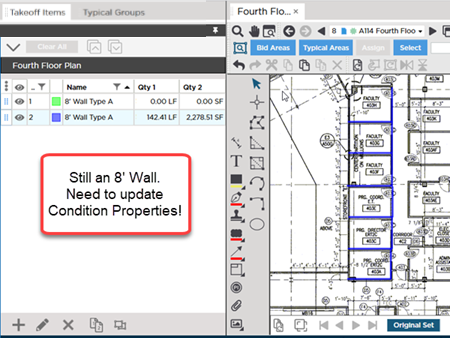
Notice: Result 2 (the square footage of the wall) has not changed. That is because our duplicate Takeoff Item is still an 8' high wall. Step 4 addresses that...
Step 4 - Adjust the New Takeoff Item's Properties
We must update the Takeoff Item Properties to account for the change in Height.
- Open the Takeoff Item (double-click it to open its properties).
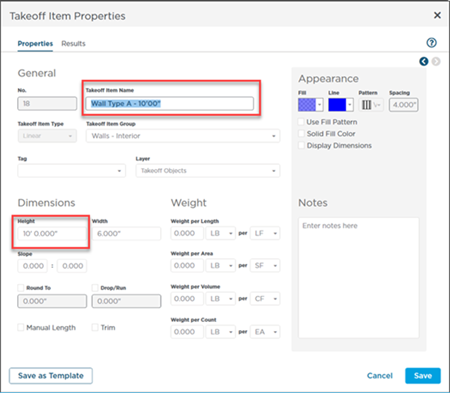
- Update the Takeoff Item Properties by changing the Height to 10'00".
Back in the Takeoff Items Pane, notice the new Result 2 value that accounts for the increased Height of the new wall.
Shortcut to Changing Height or Thickness
If you only need to change the Height of a Linear Takeoff Item or the Thickness of a Area Takeoff Item, right-click on the Takeoff Item and select "Set Height/Thickness".
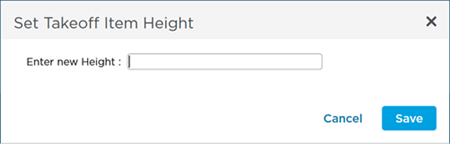
Using this shortcut, you can set the same Height (or thickness) for a Takeoff Item without having to open its Properties window.
Duplicate and Reassign affects all the
takeoff on the current
Page for the selected
Takeoff Item - there is no need or way to select individual objects. Also, Duplicate and Reassign
affects takeoff on the Active
Page,
takeoff objects on other Pages in the
bid are still associated with the original
Takeoff Item (in our example, the 8' Wall
Takeoff Item).

 Reassigning Takeoff from one Takeoff Item to Another