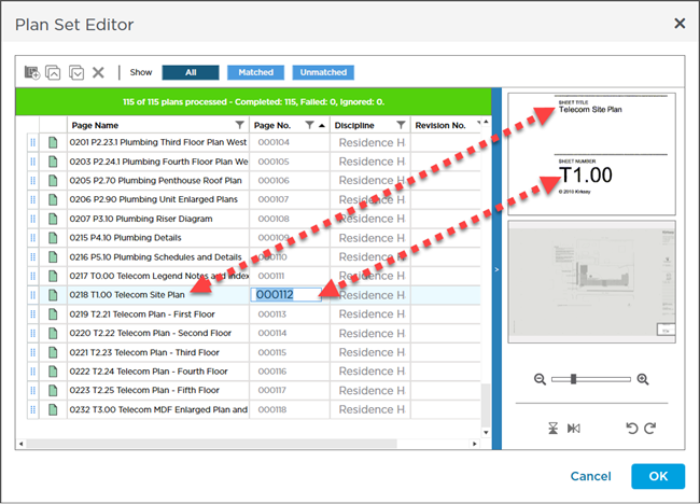
In the previous article (Adding a Revision Set), we walked you through adding a Revision Plan Set to a project. Before you click the "OK" button and save that Plan Set, you must tell the program that these new Plans are updates to or match existing Plans. If you do not match Revisions to Original when adding a Plan Set, the program creates a new Page for each Plan in the Revision Set. This is not the end of the world, because you can always edit the Plan Set after saving it to match revisions, we cover that in the next article, but it is recommended to match revisions when you add the Plan Set.
Revisions are matched using the Sheet No. Click the Sheet No. drop down for each Plan and select the Sheet No. for which it is a revision/update. In our example, it is very clear that A03 and A07 are updates to existing Plans because they are named and numbered the same.

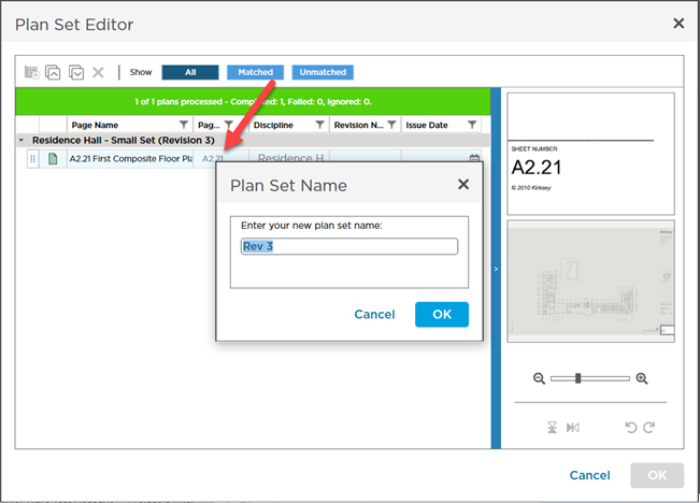
Do this for both Plans and then click OK. By default, additional Plan Sets are named "Rev 1", "Rev 2", and so on. You can update the Plan Set Name however you like, but keep it short (Why? because the Plan Set Name is used a label in the Revision Set Navigator tab on in the Takeoff window which we cover in just a few articles (see 05.07 Revision and Set Navigation Toolbar if you can't wait).

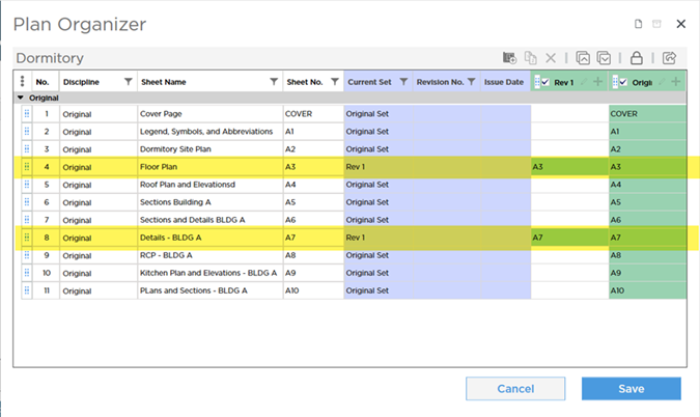
The program saves this Plan Set and uploads the new drawing files to the cloud server. Notice the highlighted rows in the Plan Organizer (we added the highlighting, they will not be highlighted in the program) and the new "Rev 1" column showing our two updated Plans.

Notice that the "Current Set" now shows that it is using Plans from "Rev 1" for Pages 4 and 8 and the rest of the Pages still use "Original Set" . Remember, the most current Revision of a Plan is what becomes part of the Current Set.
Because we matched both of the Plans in the new Revision Set to existing Plans, no new Pages are created.
If you save a Revision Plan Set and then notice you forgot to match a Revision to an existing Plan, you can edit the Plan Set to correct this.


 Adding a Revision (Addenda) Set