Typically, when you add a Revision, the program resizes it to match the size of the first Plan associated with this Page. Sometimes, the Overlay Plan is so different in dimensions or is stretched in one direction that when it is overlaid on the Base Plan it cannot be aligned. When this happens, you resize the Overlay so that it matches up to the earlier Revision.
After we add the Overlay Plan below, we notice that the Overlay cannot be aligned - part of the drawing matches, but part of it does not - this is because the Base and Overlay Plans are not the same dimensionally.
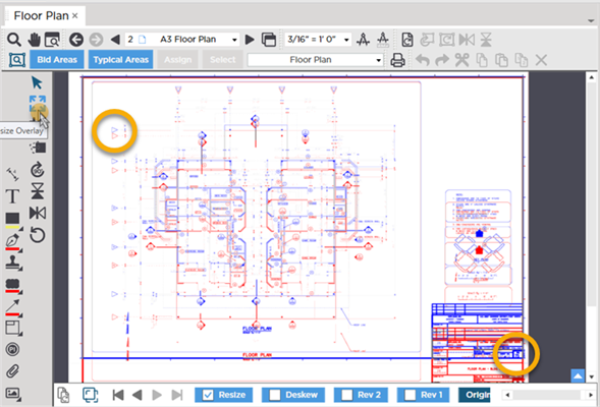
Notice that although the plan lines up horizontally (the width of the buildings seems to match), the vertical aspect is compressed on the Overlay.
The two regions circled in the screenshot above are the points we use to resize this Overlay.
Resizing an Overlay
Resizing the Overlay is a two-step process: anchoring the upper-left point, and stretching/shrinking the Overlay so that it matches a point in the bottom-right.
Step 1: Align Upper-Left Corner
- Start by clicking the
 button
 - Click on a point in the upper-left corner of the Overlay (blue) Plan (hold down the mouse button)
- Drag that point to align to the same point on the Base (red) Plan
This creates an anchor (

) - the point where the upper-left corner is set.
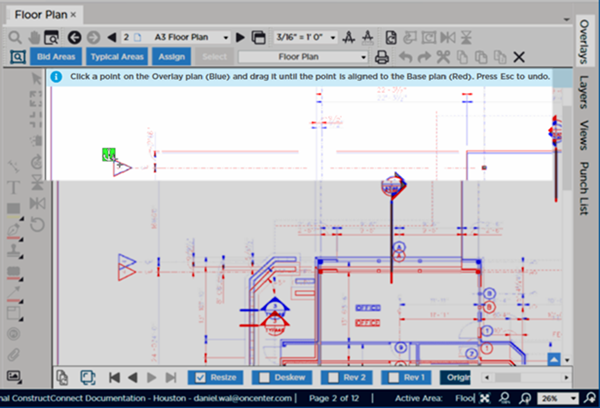
Notice how the matched region kind of turns grey - that means the Base and Overlay Plan match (for that region).
Step 2: Align Lower-Right Corner
- Next, click a point on the Overlay (blue) in the lower-right corner of the Plan
This creates the resize control ( ), this is the point that you will use to stretch/shrink the Overlay so it matches the Base Plan.
You get the best results if you choose points as close to the upper-left and lower-right corners as possible.
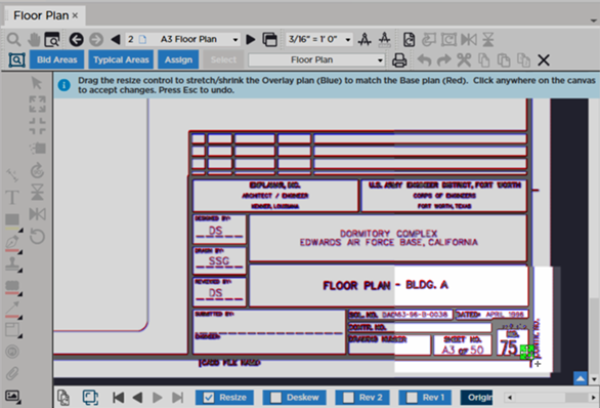
- Grab that resize control and move it to the point that matches the Base (red) Plan. (You can click outside the Plan to use the scrollbars and the pan/zoom tools to locate the points you want to match.)
As you drag the Overlay (blue) anchor point to the point it matches on the Base (red) Plan, notice more of the Page becomes greyish-purple - indicating your Plans are aligning.
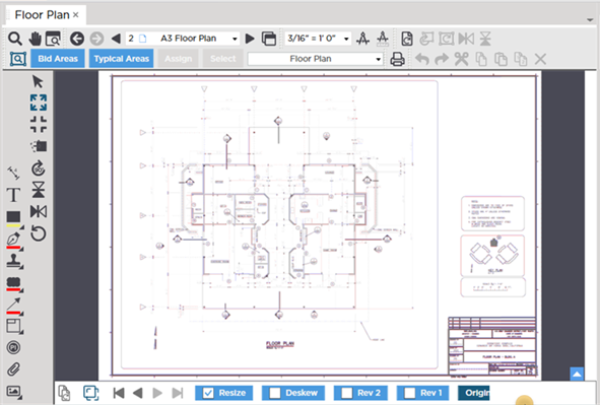
After resizing, zoom out to full-page, notice that the Base and Overlay Plans line up pretty closely and mostly appear greyish-purple.
A properly resized Overlay allows you to identify material or measurable changes between the two Plans.
The last (or only) thing you may need to do to an Overlay is align it the Base Plan (see the next article).
If you get to a point where you are have difficulty adjusting your
Overlay, just click the Reset
Overlay button (

) and start over.

 Flipping an Overlay