Using what we learned Adding Vertices (Joints) to an Area Takeoff Object a bit further, we can correct for slight inaccuracies in our takeoff.
If you need to make more than one or two minor adjustments, it's probably faster and easier to delete the Area
takeoff object and redraw it, being more precise to the
Plan.
Example
When we created our rough estimate, we were focused only on the approximate size of the area is in the screenshot below. When we drew this section of takeoff, we did not account for those two small bump outs, however now that we are fine-tuning our Bid, we need to ensure our takeoff matches the plans more precisely.
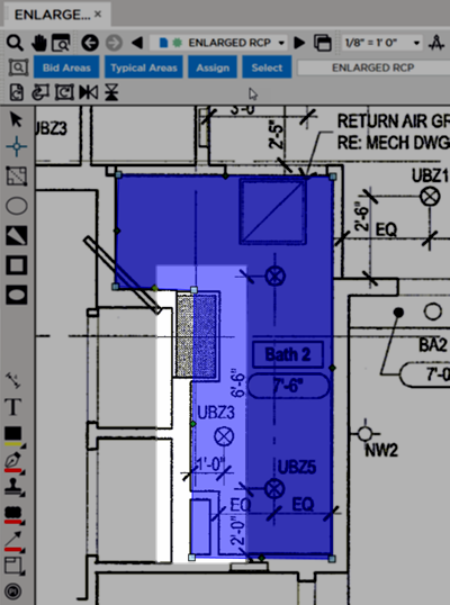
Area takeoff before it is corrected to match the Plan
We start by adding a vertex to allow us to change the corner point.
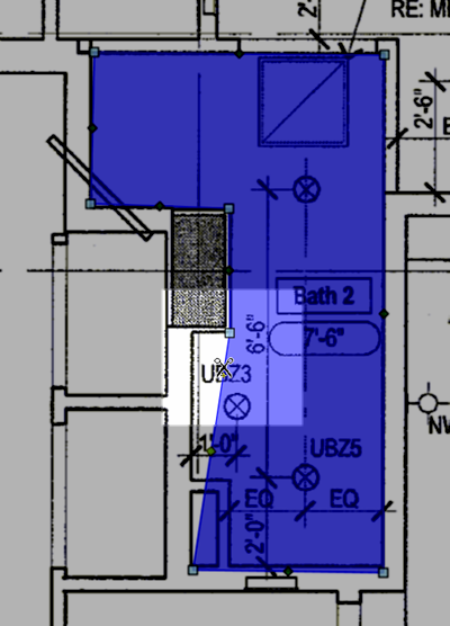
To add the vertex, select the object, hold down Ctrl+S on your keyboard, and click where you want the vertex placed (you can always move it if it isn't placed exactly where you want it).
Once you add a vertex or multiple vertices, you can then move them around to add segments to your Area takeoff object.
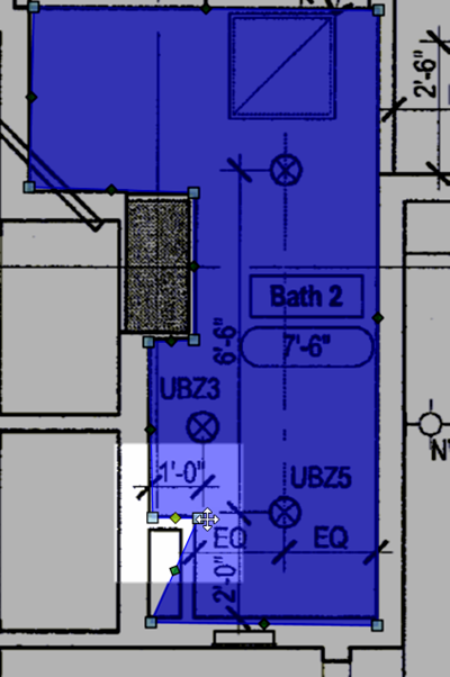
We move and add additional vertices to account for the minor adjustments to the shape.
When we are done, we have a piece of takeoff that matches the plan more accurately.
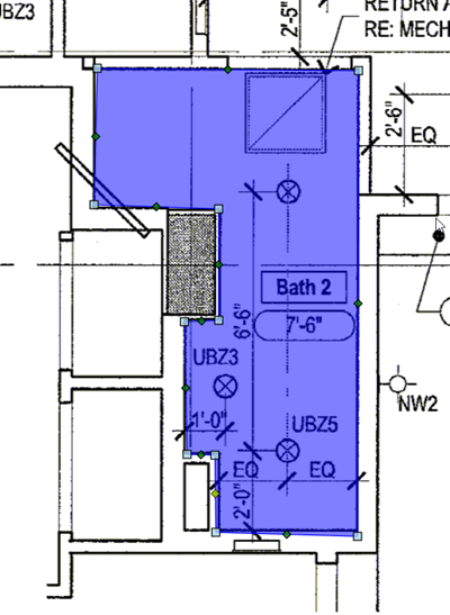
Takeoff adjusted to match the Plan more precisely
By adding a few vertices and then dragging the new segments, we are able to 'bump out' sections of wall we did not account for during our preliminary takeoff.
Another Example of Splitting Area Takeoff Segments
The "Family Area" in the floor plan below originally was taken off (the green-shaded area) and the yellow highlighted area was not included because there was a fireplace and built-in shelves there, which meant no flooring was required for this small area.
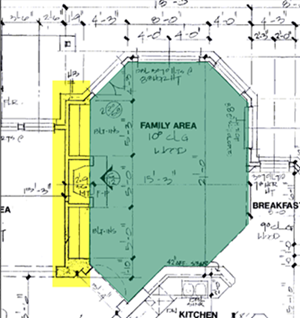
However, after we finished the takeoff, the customer decided to delete the fireplace and built-ins and now the carpeting extends to the wall.
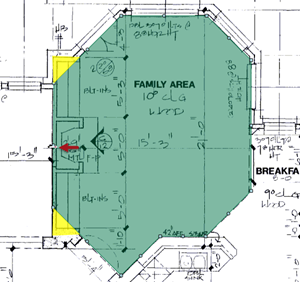
If we select that leftmost segment and drag it outward, the connected segments are extended but we miss the two corners indicated by the yellow highlight below.
After we move the segment, we need to split it into smaller segments that can move independently.
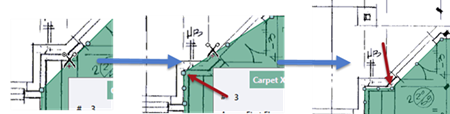
As shown in the progression of screen shots above, with the segment selected, hover the mouse cursor in the approximate area where you want to add a vertex (which is a connection between two segments, joining them).
Notice the cursor turns into a pair of scissors - click to add the vertex and pull that vertex out toward the corner - notice this causes the connected segment to pull up.
Add another vertex and pull that vertex down until the two connected segments match your Plan.
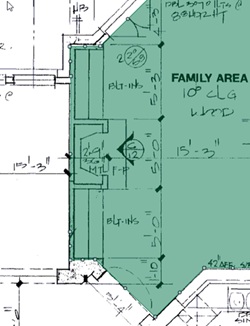
Repeat this process for the bottom corner and your takeoff should end up looking like this.
Next up, we demonstrate rotating takeoff - especially useful when you copy and paste takeoff from a landscape-oriented Page to a portrait-oriented Page.

 Adding Vertices (Joints) to an Area Takeoff Object