When you draw Area takeoff, sometimes, there are regions or "sub-areas", within the boundaries of the takeoff object, that you do not want to include in the Results, at least not with the Takeoff Item you used for the main area. We call those Backouts and using the Area Backout Tools, you can deduct some portion of an area takeoff object. For example, maybe the Architect's Plans specify a different type of flooring as an inset, or a different ceiling material for a tray ceiling.
There are three backout tools available: Polygon  , Rectangle
  , and Ellipse
  . You draw with them just like drawing area takeoff (previous articles) - choose the tool that allows you to draw the shape of the backout you need.
Example
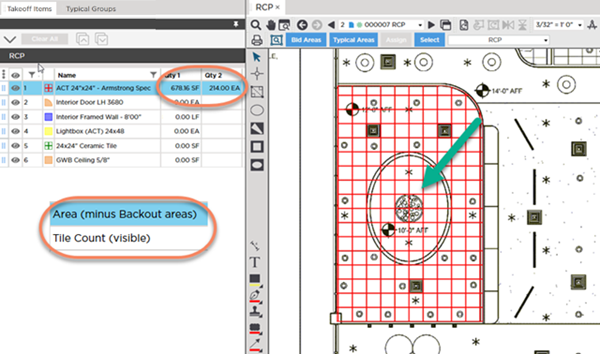
We drew takeoff on a very simple reflected ceiling drawing - something you might find in a typical office building.
Notice the oval region that is not acoustical tile? Because that region is entirely within the area takeoff object's boundaries, it is impossible to accommodate it by drawing the a Polygonal Area takeoff object alone. The Backout tools let you remove (cut out/backout) that oval from the area takeoff. After you draw the Backout, you can auto-fill it with takeoff from one or more other Takeoff Items (we cover this in the next article).
When you are drawing your takeoff, draw the takeoff for the main area and (for now) ignore those internal regions. Do not try to draw your main area around internal empty spaces because that causes incorrect perimeter and grid measurements.
If you are using a
Takeoff Item that includes a grid, such as in our example, before drawing any backouts,
align the takeoff to the Plan's grid. Trying to align after drawing Backouts can cause problems. See
Aligning Gridded Area for more information.
Next, while you have that same Area Takeoff Item selected, click on one of the Backout tools on the toolbar.
Using the appropriate Backout Tool, draw the region that you want to cut out, again, see the previous articles for details on using the Polygon, Rectangle, and Ellipse Area Takeoff Tools.

We demonstrated the above using the Ellipse Tool but using one the Backout Tools provided, you can accommodate any shape.
One rule to keep in mind: your
Backout cannot extend past the boundaries of the Area
takeoff object (for example, you cannot use Backouts to create a C-shaped object with a completely opened end. To accommodate an open
takeoff object like that, you just use the Area Polygon
Takeoff tool to draw the complex shape.
Now that you have that hole in your takeoff, you probably want to fill it with another Takeoff Item (in our example, we would probably use something like "Gypsum Ceiling"). The next article shows you how you can fill that Backout with one or more Takeoff Items - in literally, one double-click.
Before drawing any
takeoff or backouts, you must set and
verify Scale, see Related Articles.

 Showing Partial Tiles in a Gridded Area